Aim: To learn about a saturated solution and how to make crystals
Definition of solution:
A liquid mixture, when something is dissolved into a liquid (eg: sugar in water)
Definition of saturated:
Having or holding as much as can be absorbed of something (when no more sugar or borax can be dissolved into the water)
In groups of three you will make three different types of crystals and compare the results.
Borax Crystals

Ratio; 3 Tablespoons Borax per 1/2 cup water
Materials
1) A cup
2) Water
3) Popsicle stick
4) Borax
5) String
6) Warm water
7) Spoon
Process
Step 1: Grab a cup or glass
Step 2: Put 3 tables spoons of borax and 1/2 cups of water
Step 3: Add the ingredients to your cup or glass
Step 4: Mix all the ingredients together with a Popsicle stick
Step 5: Tie your string into a Popsicle stick
Step 6: Make a snowflake or a star with your pipe cleaner
Step 7: Put your star or snowflake into the borax and water solution
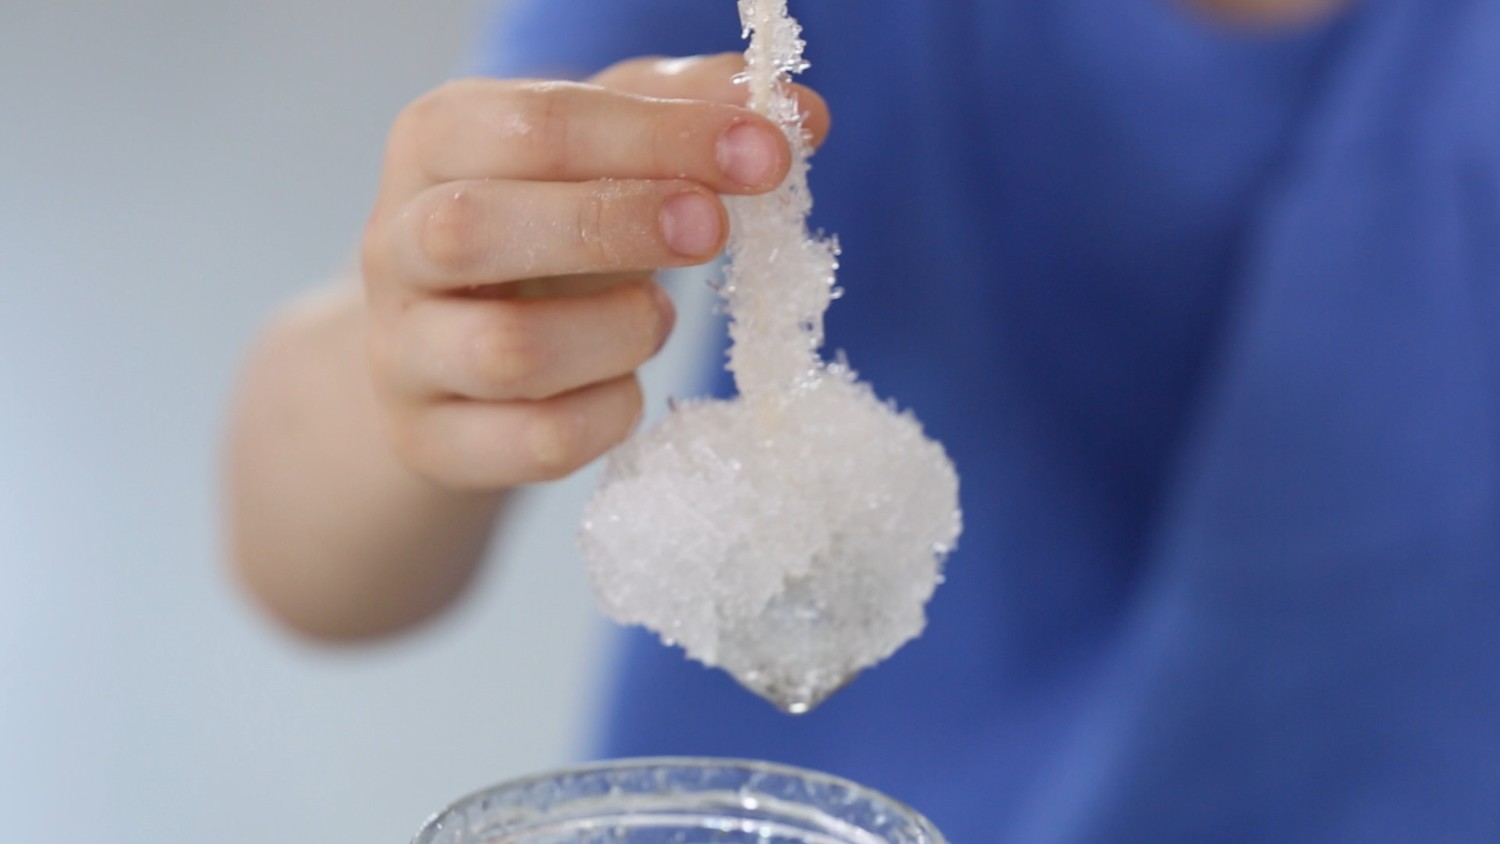
Sugar Crystals

Materials
1) 4 spoons of sugar
2) String
3) A cup
4) Warm water
5) Popsicle stick
Process
Step 1: Get a cup
Step 2: Measure four table spoons of sugar into your cup
Step 3: Ask a teacher for a half cup of warm water into your sugar
Step 4: Mix the solution with your Popsicle stick
Step 5: Tie a string onto the middle of the Popsicle stick
Step 6: Dip the string into the water and rest the Popsicle stick across the cup
Salt Crystals
Ratio: 4 Tablespoons salt to 1/2 cup water
Materials
1) Salt
2) Popsicle stick
3) A cup
4) Warm water
5) String
6) Spoon
7)
6) Spoon
7)
Process
Step 1: Get a cup
Step 2: Measure four table spoons of salt into your cup
Step 3: Ask your teacher for some warm water into your salt
Step 4: Mix the ingredients together
Step 5: Tie a string into a Popsicle stick
Step 6: Dip your string in the water and rest your Popsicle stick across your cup
Findings
Describe your crystals in the table below.
Crystal Type
|
Shape
(Describe the shape) |
Size
(of individual crystals) |
Hardness
(Crumbly to Rock Hard) |
Borax
| No crystals formed | No crystals formed | No crystals formed |
Sugar
| Long | Small | Hard |
Salt
| Tiny Shards | Tiny | Hard |
What crystals worked out best and why?:
Conclusion:

Conclusion:
After watching the videos as a class, explain how the following crystals are formed:
Type
|
Explanation
|
Salt
|
Sea wataer ponds sun evaporate salt
|
Sugar
|
Sugar Cane, Cut it up, Roll it/Squish, Get the juice, Heat it, Syrup, Crystallisation
|
Snowflakes
|
CRYSTAL TYPES
AIM: TO LOOK AT THE 7 DIFFERENT TYPES OF CRYSTALS
 |
| Salt Crystals |
| Sugar Crystals |
 |
| Borax Crystals |
7 different crystal shapes

The 7 types of crystals
Type
|
Number of sides
|
2 examples
|
Image
|
Triclinic
| 7 | Turquoise Rhodonite | 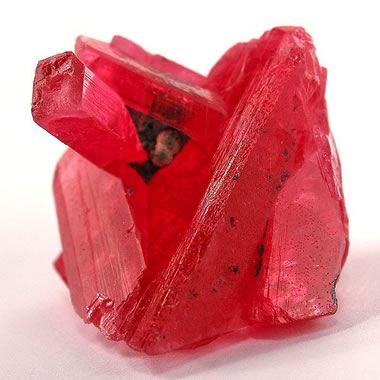 |
Monoclinic
| 10 |   |  |
Orthombic
| 6 |  | |
Trigonal
| 10 | |  |
Hexagonal
| 8 |  | |
Cubic
| 6 |  |  |
Tetragonal
| 12 |  |


